
Mastering the Examination Roblox Sector 3 Map: A Complete Survival Guide
Struggling to reach or survive in Examination Roblox Sector 3? This guide covers key progression steps, map layouts, and essential tips for your run.
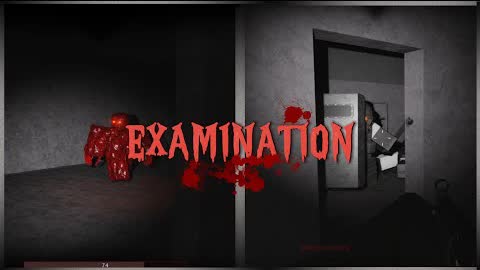 Gameplay videoStruggling to reach or survive in Examination Roblox Sector 3? This guide covers key progression steps, map layouts, and essential tips for your run.YouTube
 Navigating the Itagura NPP: Your Path to Success
If you are diving into the intense, atmospheric world of Examination, you know that reaching the later stages of the Itagura NPP is no small feat. Navigating the examination roblox sector 3 area requires careful planning, precise movement, and a solid understanding of the facility’s complex layout. Whether you are a newcomer trying to survive your first run or a veteran aiming to perfect your speed, understanding how to transition from the lower sectors into the high-stakes environment of examination roblox sector 3 is the key to mastering this challenging map.
The game forces players to move through a series of increasingly difficult zones, starting from the lobby and descending into the dangerous basement, all before reaching the final sectors. By mastering the progression mechanics, you ensure that your team is fully equipped to handle the threats waiting deep within the facility.
Core Progression: From Entrance to Sector 3
Progression in Examination is highly linear, requiring players to interact with specific environmental objects to unlock doors and move forward. You cannot simply sprint to the end; you must solve the logistical puzzles left behind in the facility.
Essential Progression Steps
| Location | Task Required | Outcome |
|---|---|---|
| Lobby | Initial Spawn | Begin the mission |
| Sector 1 | Activate Generator Pump #1 | Opens access to Basement |
| Basement | Locate and Activate Backup Generator | Allows deeper exploration |
| Basement | Operate the Basement Valve | Unlocks the "Yellow Sector" |
| Sector 2 | Interact with Laptop/Logistics | Grants access to Sector 3 |
According to community reports, the transition between sectors is gated by specific interactions. If you find yourself stuck, always re-check the previous sector for missed laptops or valves, as these are frequently the bottleneck for progression.
Understanding the Hazards of the Basement
The journey to the later sectors is not just about clearing hostiles; it is about managing environmental hazards. The most notorious obstacle is the "Elephant's Foot." Community experience warns that players must strictly avoid looking at this hazard. If you gaze upon it, you will face an instant death, regardless of your current health or armor status.
Hazard Management Tips
- Radiation Warnings: Always look for the radiation warning notes left near hazardous areas.
- Hazmat Operatives: These NPCs often stand near dangerous zones; use them as a visual indicator to stop moving or avert your gaze.
- Valve Timing: When entering the room to activate the basement valve, move quickly and keep your camera pointed away from the threat.
Sector 2 Logistics: The Key to Sector 3
Before you can step foot into the final area, you must navigate the complexities of Sector 2. This is the most crucial part of your run, as it contains the final steps required to open the path forward.
Sector 2 Checklist
- Control Room Access: Head to the furthest room on the left and interact with the laptop on the floor.
- Emergency Shutters: Use the "emergency door shutters" button to clear your path.
- Gate Control: You must locate the blue keycard in the Gate-1 area.
- Final Unlock: Use the blue keycard on the card reader in the logistics staircase, then find the final laptop to open the path to the end.
Tactical Breakdown of Areas
Understanding the physical layout of the facility helps in coordinating with teammates. Below is a breakdown of the zones you will encounter on your way to the endgame.
| Sector | Primary Threat Level | Key Interaction Point |
|---|---|---|
| Entrance | Low | Coffee Machine / Lobby |
| Sector 1 | Moderate | Generator Pump #1 |
| Basement | High | Elephant's Foot / Valve |
| Sector 2 | Very High | Logistics Keycard / Laptop |
| Sector 3 | Extreme | Rasonian Clearance |
Player Experience: Tips for Survival
Veteran players often emphasize that communication is the most important tool in your inventory. Because the map is filled with tight corridors and limited visibility, calling out the locations of hostiles is vital.
Community reports suggest that players should prioritize clearing the "Rasonians" as soon as they enter the final sector. If you leave these hostiles unchecked, they can easily overwhelm your team during the final objectives. Always ensure your team has a designated "point person" who knows the route, while others cover the rear.
Frequently Asked Questions
How do I open the path to Examination Roblox Sector 3?
To unlock the final area, you must reach the Sector 2 Logistics area, obtain the blue keycard from the Gate-1 zone, and use it on the card reader at the staircase. Once inside, interact with the laptop to open the door to the final sector.
What is the most dangerous hazard on the way to Sector 3?
The most dangerous hazard is the "Elephant's Foot" found in the basement. Players must avoid looking at it entirely; if you make eye contact with it, you will die instantly.
Are there any specific items needed for the final sector?
While the primary requirement is completing the objective sequence involving the laptops and keycards, having a reliable primary weapon like the P95—found in the Sector 2 Armory—is highly recommended to survive the final push.
Where can I find more detailed map information?
For visual references and the most up-to-date community findings, you can visit the Official Examination Wiki to see the latest community-contributed map layouts and patch notes.
Related Guides
Complete Guide to Navigating the Examination Roblox Sector 4 and Beyond: Map Mastery
Struggling with the layout of Itagura NPP? Our guide covers the Examination Roblox Sector 4 navigation, basement mechanics, and essential survival tips.
Mastering Examination Roblox Sector 2: The Ultimate Survival and Progression Guide
Navigate the dangers of the Itagura NPP with our comprehensive guide to Examination Roblox Sector 2, covering keycards, puzzles, and the Elephant's Foot.
Mastering the Examination Roblox Map: A Comprehensive Guide to Itagura NPP
Navigate the dangerous halls of the Itagura NPP with our ultimate guide to the Examination Roblox map. Learn sector secrets and survival tips.
Mastering the Examination Roblox Tunnels Map: A Complete Survival Guide
Struggling to survive the Examination Roblox Tunnels map? Discover secret entry methods, survival tips, and strategies to outrun HIM in this guide.