
Mastering the Examination Roblox Map: A Comprehensive Guide to Itagura NPP
Navigate the dangerous halls of the Itagura NPP with our ultimate guide to the Examination Roblox map. Learn sector secrets and survival tips.
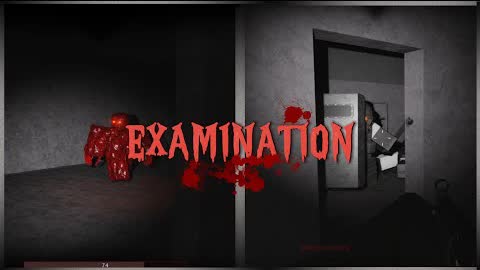 Gameplay videoNavigate the dangerous halls of the Itagura NPP with our ultimate guide to the Examination Roblox map. Learn sector secrets and survival tips.YouTube
 Navigating the Itagura NPP: Your Ultimate Survival Guide
Surviving the atmospheric horror of the Examination Roblox map requires more than just quick reflexes; it demands an intimate understanding of the facility's layout. Whether you are a newcomer struggling to find the lobby or a veteran looking to optimize your run, mastering the examination Roblox map is the key to conquering the challenges hidden within the dark, claustrophobic corridors of the Itagura Nuclear Power Plant. This guide breaks down the critical sectors, hidden objectives, and environmental hazards you will face in this intense experience.
Understanding the Facility Layout
The facility is divided into distinct zones, each presenting unique threats and progression requirements. Understanding the flow from the lobby to the deeper, more dangerous sectors is essential for any player hoping to reach the end.
| Sector | Key Features | Primary Objective |
|---|---|---|
| Entrance | Lobby, Coffee Machine | Establish a staging point |
| Sector 1 | Decontamination, Pump #1 | Activate the first generator |
| Basement | Reactor 4, Elephant's Foot | Locate the backup generator |
| Sector 2 | Armory, Control Room | Unlock emergency exits |
| Sector 3 | Rasonian cleanup | Final objective clearance |
The Entrance and Sector 1: The First Steps
Your journey begins at the Itagura NPP entrance. This area serves as a safe zone where infected entities are unable to follow, providing a brief respite. As you move toward the decontamination showers, keep in mind that the transition into Sector 1 is a major turning point. According to community reports, the decontamination showers act as a hard barrier; while standard enemies can pass through, high-level threats like the Chimera are effectively blocked from entering the spawn area.
To progress, you must locate and activate the generator pump in Sector 1. This is a mandatory step that triggers the next phase of the game. Once the pump is active, listen for the audio cues that signal the unlocking of the basement doors.
Surviving the Basement and the Elephant's Foot
The Basement, or Reactor 4, is arguably the most treacherous part of the examination Roblox map. It is here that players encounter the "Elephant's Foot," a lethal environmental hazard that demands absolute caution.
Critical Survival Rules for the Basement:
- Do Not Look: When entering the chamber housing the Elephant's Foot, looking directly at it will result in immediate character death.
- The Valve Puzzle: You must locate and activate the basement valve to unlock the "yellow sector" where the second reactor pump resides.
- Radiation Warnings: Pay close attention to the notes left by previous operatives; they often contain vital clues regarding environmental hazards.
Strategic Logistics in Sector 2
Once you have successfully navigated the basement, Sector 2 opens up, providing access to essential gear and progression tools. This area is highly tactical, requiring players to interact with specific equipment to advance.
| Equipment | Location | Function |
|---|---|---|
| P95 Pistol | Armory | Essential defense |
| Laptop | Control Room | Opens the emergency exit |
| Blue Keycard | Gate-1 Area | Accesses the Gate Control area |
| Logistics Switch | Logistics Area | Unlocks Sector 3 |
According to player experience, the control room puzzle is a frequent stumbling block. To open the main control area, you must head to the leftmost room and interact with a laptop placed on the floor. Following this, you must manipulate the "emergency door shutters" button to ensure your path remains open for a quick retreat.
Essential Tips for Success
Efficiency is the name of the game when exploring the examination Roblox map. To improve your survival rate, consider these expert strategies:
- Inventory Management: Always prioritize ammo and keycards. The P95 found in the Sector 2 Armory is a reliable sidearm for clearing narrow corridors.
- Environmental Awareness: The map is filled with audio and visual cues. If you hear a loud buzzer or a strange mechanical sound, it often indicates a change in the facility's status or the arrival of a hostile.
- Community Knowledge: For those struggling with the complex navigation of the higher sectors, checking the official Examination Wiki can provide updated data on recent map reworks and patch notes.
Frequently Asked Questions
Q: What is the most dangerous area in the examination Roblox map? A: The Basement is widely considered the most dangerous area due to the lethal presence of the Elephant's Foot, which kills players who look at it.
Q: How do I open Sector 3? A: To access Sector 3, you must first secure the blue keycard from the Gate-1 area within Sector 2, then use it on the card reader to reach the Sector 2 Logistics laptop, which triggers the final gate.
Q: Are there any safe zones in the map? A: The main lobby and the initial spawn area are generally considered safe, as many enemies are blocked by decontamination barriers or programmatic boundaries that prevent them from entering.
Q: Why do I keep dying in the basement? A: Ensure you are not looking at the Elephant's Foot when entering its chamber. This is a common trap for new players who are not aware of the specific environmental mechanics of the examination Roblox map.
Related Guides
Complete Guide to Navigating the Examination Roblox Sector 4 and Beyond: Map Mastery
Struggling with the layout of Itagura NPP? Our guide covers the Examination Roblox Sector 4 navigation, basement mechanics, and essential survival tips.
Mastering Examination Roblox Sector 2: The Ultimate Survival and Progression Guide
Navigate the dangers of the Itagura NPP with our comprehensive guide to Examination Roblox Sector 2, covering keycards, puzzles, and the Elephant's Foot.
Mastering the Examination Roblox Sector 3 Map: A Complete Survival Guide
Struggling to reach or survive in Examination Roblox Sector 3? This guide covers key progression steps, map layouts, and essential tips for your run.
Mastering the Examination Roblox Tunnels Map: A Complete Survival Guide
Struggling to survive the Examination Roblox Tunnels map? Discover secret entry methods, survival tips, and strategies to outrun HIM in this guide.