
The Ultimate Examination Roblox Guide: How to Survive the Itagura NPP
Master the halls of the Itagura NPP with our comprehensive examination roblox guide. Learn about sector navigation, enemy types, and survival tips.
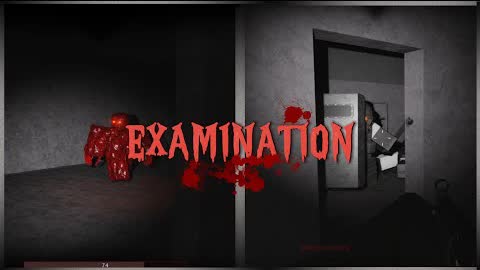 Gameplay videoMaster the halls of the Itagura NPP with our comprehensive examination roblox guide. Learn about sector navigation, enemy types, and survival tips.YouTube
 Surviving the dark, claustrophobic corridors of the Itagura NPP requires more than just quick reflexes; it demands a deep understanding of the facility's layout and mechanics. This examination roblox guide is designed to walk you through the harrowing challenges of the game, from the initial lobby to the high-stakes encounters in the depths of Reactor 4. As you step into this atmospheric horror experience, this examination roblox guide will serve as your primary resource for avoiding the infected and mastering the complex systems of the power plant.
The game is known for its high-fidelity graphics and intense CPU demands, making it a standout title on the Roblox official website. Players often report that the atmosphere is heavily inspired by tactical horror shooters, requiring a blend of stealth, resource management, and precise aim. In this article, we will break down the essential strategies, item locations, and enemy behaviors you need to know to reach the end of the line.
Core Mechanics and Controls
Before diving into the radioactive depths of the facility, you must familiarize yourself with how the game handles. Unlike standard Roblox experiences, this title emphasizes realistic movement and stamina management. If your stamina drops too low, your character's aim will become unsteady, making it nearly impossible to land critical headshots on the infected.
Community reports suggest that players should always keep an eye on their stamina bar before engaging in a firefight. If you are caught sprinting when a zombie appears, you may find yourself unable to aim effectively, leading to a quick trip back to the lobby. The game features an automatic flashlight, but it is not always reliable in the deepest sectors, so staying aware of your surroundings is paramount.
Essential Control Scheme
| Action | Keybind | Description |
|---|---|---|
| Reload Weapon | R | Essential for keeping your firearm ready. |
| Sprint | Shift | Consumes stamina; use sparingly in combat zones. |
| Aim Down Sights | Right Click | Increases accuracy but slows movement. |
| Interact | E / Click | Used for laptops, valves, and doors. |
| Use Item | Number Keys | Select and use consumables or throwables. |
Mastering the Examination Roblox Guide: Sector Navigation
The Itagura NPP is divided into several distinct sectors, each requiring specific actions to unlock the next. You begin in the Lobby, which acts as a safe zone where the infected cannot enter. However, once you pass through the Decontamination showers, the real challenge begins.
The Entrance and Sector 1
The Lobby contains several points of interest, including the locker room where you can prepare for the mission. Once you move into Sector 1, your first major objective is to locate and activate Generator Pump #1. Activating this pump triggers a sequence that allows access to the basement.
Reactor 4 and the Basement
The basement is one of the most dangerous areas in the game. To progress, you must navigate through utility tunnels to find the Backup Generator. It is important to note that the Backup Generator does not count toward your main generator total but is required to power the Basement Valve. The most infamous hazard here is the "Elephant's Foot." Player experience warns that looking directly at this radioactive mass will result in near-instant death.
Sector 2 and Logistics
After using the Basement Valve to unlock the "Yellow Sector," you will gain access to Sector 2. This area contains the Armory, where you can find the P95 sidearm and additional ammunition. To move toward the endgame, you must navigate the Logistics area, collect a blue keycard from Gate-1, and use a laptop to unlock the path to Sector 3.
| Sector | Key Objective | Major Hazard |
|---|---|---|
| Lobby | Select Class / Prepare | None (Safe Zone) |
| Sector 1 | Activate Generator Pump #1 | Standard Infected |
| Basement | Turn Basement Valve | Elephant's Foot (Radiation) |
| Sector 2 | Collect Blue Keycard | Chimera / Ambush Points |
| Sector 3 | Clear Rasonians | High-level Hostiles |
Classes and Loadouts
When you start your run, you have the option to select from various classes. Each class offers a different starting experience, though the "Standard" class is generally recommended for those following this examination roblox guide for the first time. The choice of class determines your initial resilience and how you interact with the environment.
Class Comparison
| Class Name | Difficulty | Notable Traits |
|---|---|---|
| Standard | Easy | Balanced stats, ideal for learning the map. |
| Pre-Alpha | Medium | Specialized equipment for veteran players. |
| D-Zero | Hard | High risk, high reward gameplay mechanics. |
According to community reports, the choice of class can significantly impact your stamina regeneration rates. Managing your resources, such as the Saint Chocolate bars found throughout the map, is vital. These bars help restore your character’s energy, allowing you to maintain your aim during intense encounters with the Rasonians and other infected entities.
Surviving the Infected and Unique Hazards
The enemies in the Itagura NPP are not your typical slow-moving zombies. They are aggressive and can often trap a player in narrow hallways. The most dangerous entity is the Chimera (formerly known as Flare). In older versions of the game, the Chimera was blocked by an "Incorrect Buzzer" mechanic at the spawn, but in the current build, it is a relentless stalker that requires tactical movement to evade.
Hazard Awareness: The Elephant's Foot
One of the most unique mechanics in the game is the Elephant's Foot located in the basement. This is a direct reference to the real-life Chernobyl disaster. In the game, you will encounter a hazmat operative near a radiation warning note. You must resist the influence of the radiation and, most importantly, do not look at the mass. If it enters your field of vision for more than a second, your health will rapidly deplete.
Enemy Behavior Guide
- Standard Infected: These roam the hallways of Sector 1 and 2. They are best dealt with via headshots from a distance.
- Rasonians: Found primarily in Sector 3, these enemies are more organized and require high-caliber weapons to dispatch.
- Chimera: A boss-like entity that chases players. It cannot pass through decontamination showers, making them a vital "reset" point for players being hunted.
- The Elephant's Foot: A stationary environmental hazard. The only way to survive is to keep your camera pointed away from it while navigating the room.
Essential Items and Where to Find Them
To survive the long trek through the facility, you need to scavenge for supplies. Following a detailed examination roblox guide will help you identify which items are worth the inventory space and which are distractions.
- Saint Chocolate: A consumable bar that restores stamina. Essential for long sprints through the utility tunnels.
- Glowing Camlin: A throwable light source or chemical agent that can be used to distract enemies or illuminate dark corners.
- Blue Keycard: Located in the Sector 2 Logistics area (Gate-1). This is a mandatory item for progression.
- P95 & Ammo: Found in the Sector 2 Armory. This provides a significant upgrade over basic starting weapons.
| Item | Location | Primary Use |
|---|---|---|
| Laptop | Various | Used to reboot systems and open sector gates. |
| Valve | Basement | Unlocks the path to the Yellow Sector. |
| Flashlight | Automatic | Provides visibility in dark sectors (CPU heavy). |
| Keycard | Gate-1 (Sector 2) | Grants access to Gate Control and Sector 3. |
Advanced Survival Strategies
Once you have mastered the basics, you can start implementing advanced tactics to speed up your runs or survive longer in the deeper sectors. Many players who use an examination roblox guide overlook the importance of sound cues. The game uses directional audio to warn you of approaching zombies or the activation of pumps.
Stamina and Aiming Synergy
One of the most important tips for high-level play is the "stamina-aim" synergy. When your stamina is full, your weapon sway is non-existent. As you lose stamina, the sway increases. If you are forced to fight while exhausted, try to crouch; community reports suggest this can slightly mitigate the aim penalty, though it makes you a slower target.
The "Decontamination" Reset
If you are being chased by a large group of infected or the Chimera, head back toward the Decontamination showers. These areas act as a barrier for many enemy types. By crossing the shower line, you can force the AI to reset its pathing, giving you a precious few seconds to reload your P95 and consume a chocolate bar.
Technical Tips and Performance Optimization
Because the game features high-quality assets and complex lighting, it can be very taxing on your computer's CPU. If you experience frame drops or stuttering, it will directly affect your ability to aim and interact with objects.
- Reduce Graphics Quality: Lowering the Roblox graphics slider can significantly improve your frame rate in the basement areas.
- Toggle Flashlight: While the flashlight is automatic, being in well-lit areas like the Lobby allows the engine to breathe.
- Close Background Apps: Since the game is CPU-intensive, ensure no heavy programs are running in the background.
Consulting an examination roblox guide is just the first step. The real mastery comes from repeated runs through the Itagura NPP, learning the exact timing of the generator pumps, and becoming comfortable with the terrifying atmosphere of the basement.
Frequently Asked Questions
How do I open the Sector 2 Emergency Exit?
To open the emergency exit, you must first reach the Sector 2 Control Room. Inside, you will find a laptop on the floor in the furthest room to the left. Interacting with this laptop will allow you to press the "Emergency Door Shutters" button, which clears the path for your escape or further exploration.
What happens if I look at the Elephant's Foot?
Looking at the Elephant's Foot is a fatal mistake. The game simulates extreme radiation poisoning, which will drain your health in a matter of seconds. To survive the Basement Valve room, you must navigate using your peripheral vision or by memorizing the floor layout to keep the hazard out of your direct line of sight.
Where can I find more ammo for the P95?
Ammo is most commonly found in the Sector 2 Armory. However, you should also check the locker rooms near the Itagura NPP entrance and the small utility rooms scattered throughout Sector 1. Always press 'R' to reload whenever you have a quiet moment, as you don't want to be caught with an empty clip during a zombie ambush.
How does this examination roblox guide help with the Chimera?
This examination roblox guide highlights the Chimera's inability to pass through Decontamination showers. By understanding this boundary, you can plan your exploration routes to always have a "safe zone" within reach. Additionally, knowing that the Chimera replaces the older "Flare" enemy helps you understand its aggressive stalking behavior compared to standard infected.
Related Guides
Examination Roblox All Badges: A Comprehensive Guide to Unlocking Every Achievement
Looking for a complete list of Examination Roblox all badges? Discover which achievements you can earn right now and which ones remain hidden.
Examination Roblox Tips: The Ultimate Survival Guide for the WE-30 Outbreak
Master the irradiated halls of Menlo with our Examination Roblox tips. Learn boss strategies, class builds, and survival tactics for the WE-30 outbreak.
Examination Roblox: How to Get Underequipped Achievement and Survival Tips
Master the Examination Roblox how to get underequipped challenge with our comprehensive guide to sectors, gear management, and rare badge hunting.
Examination Roblox: How to Play This Intense PvE Horror Shooter Guide
Master the irradiated halls of Menlo in Examination on Roblox. Learn how to play, manage your gear, and survive the WE-30 outbreak with our expert guide.